Getting started with Docker Compose
Docker Compose is a tool for running multi-container Docker applications. Instead of starting and managing each container separately, you can define all the services your application needs in a single YAML file.
This could include a frontend, backend, database, or several other services. Docker Compose then handles starting and managing these services with a single command.
In this guide, you’ll learn how to set up Docker Compose and use it to run a full-stack application with multiple services.
Prerequisites
To follow along in this tutorial, you should meet these requirements:
- A working knowledge of Docker and its various commands
- Basic familiarity with the terminal.
Step 1: Setting up the demo app
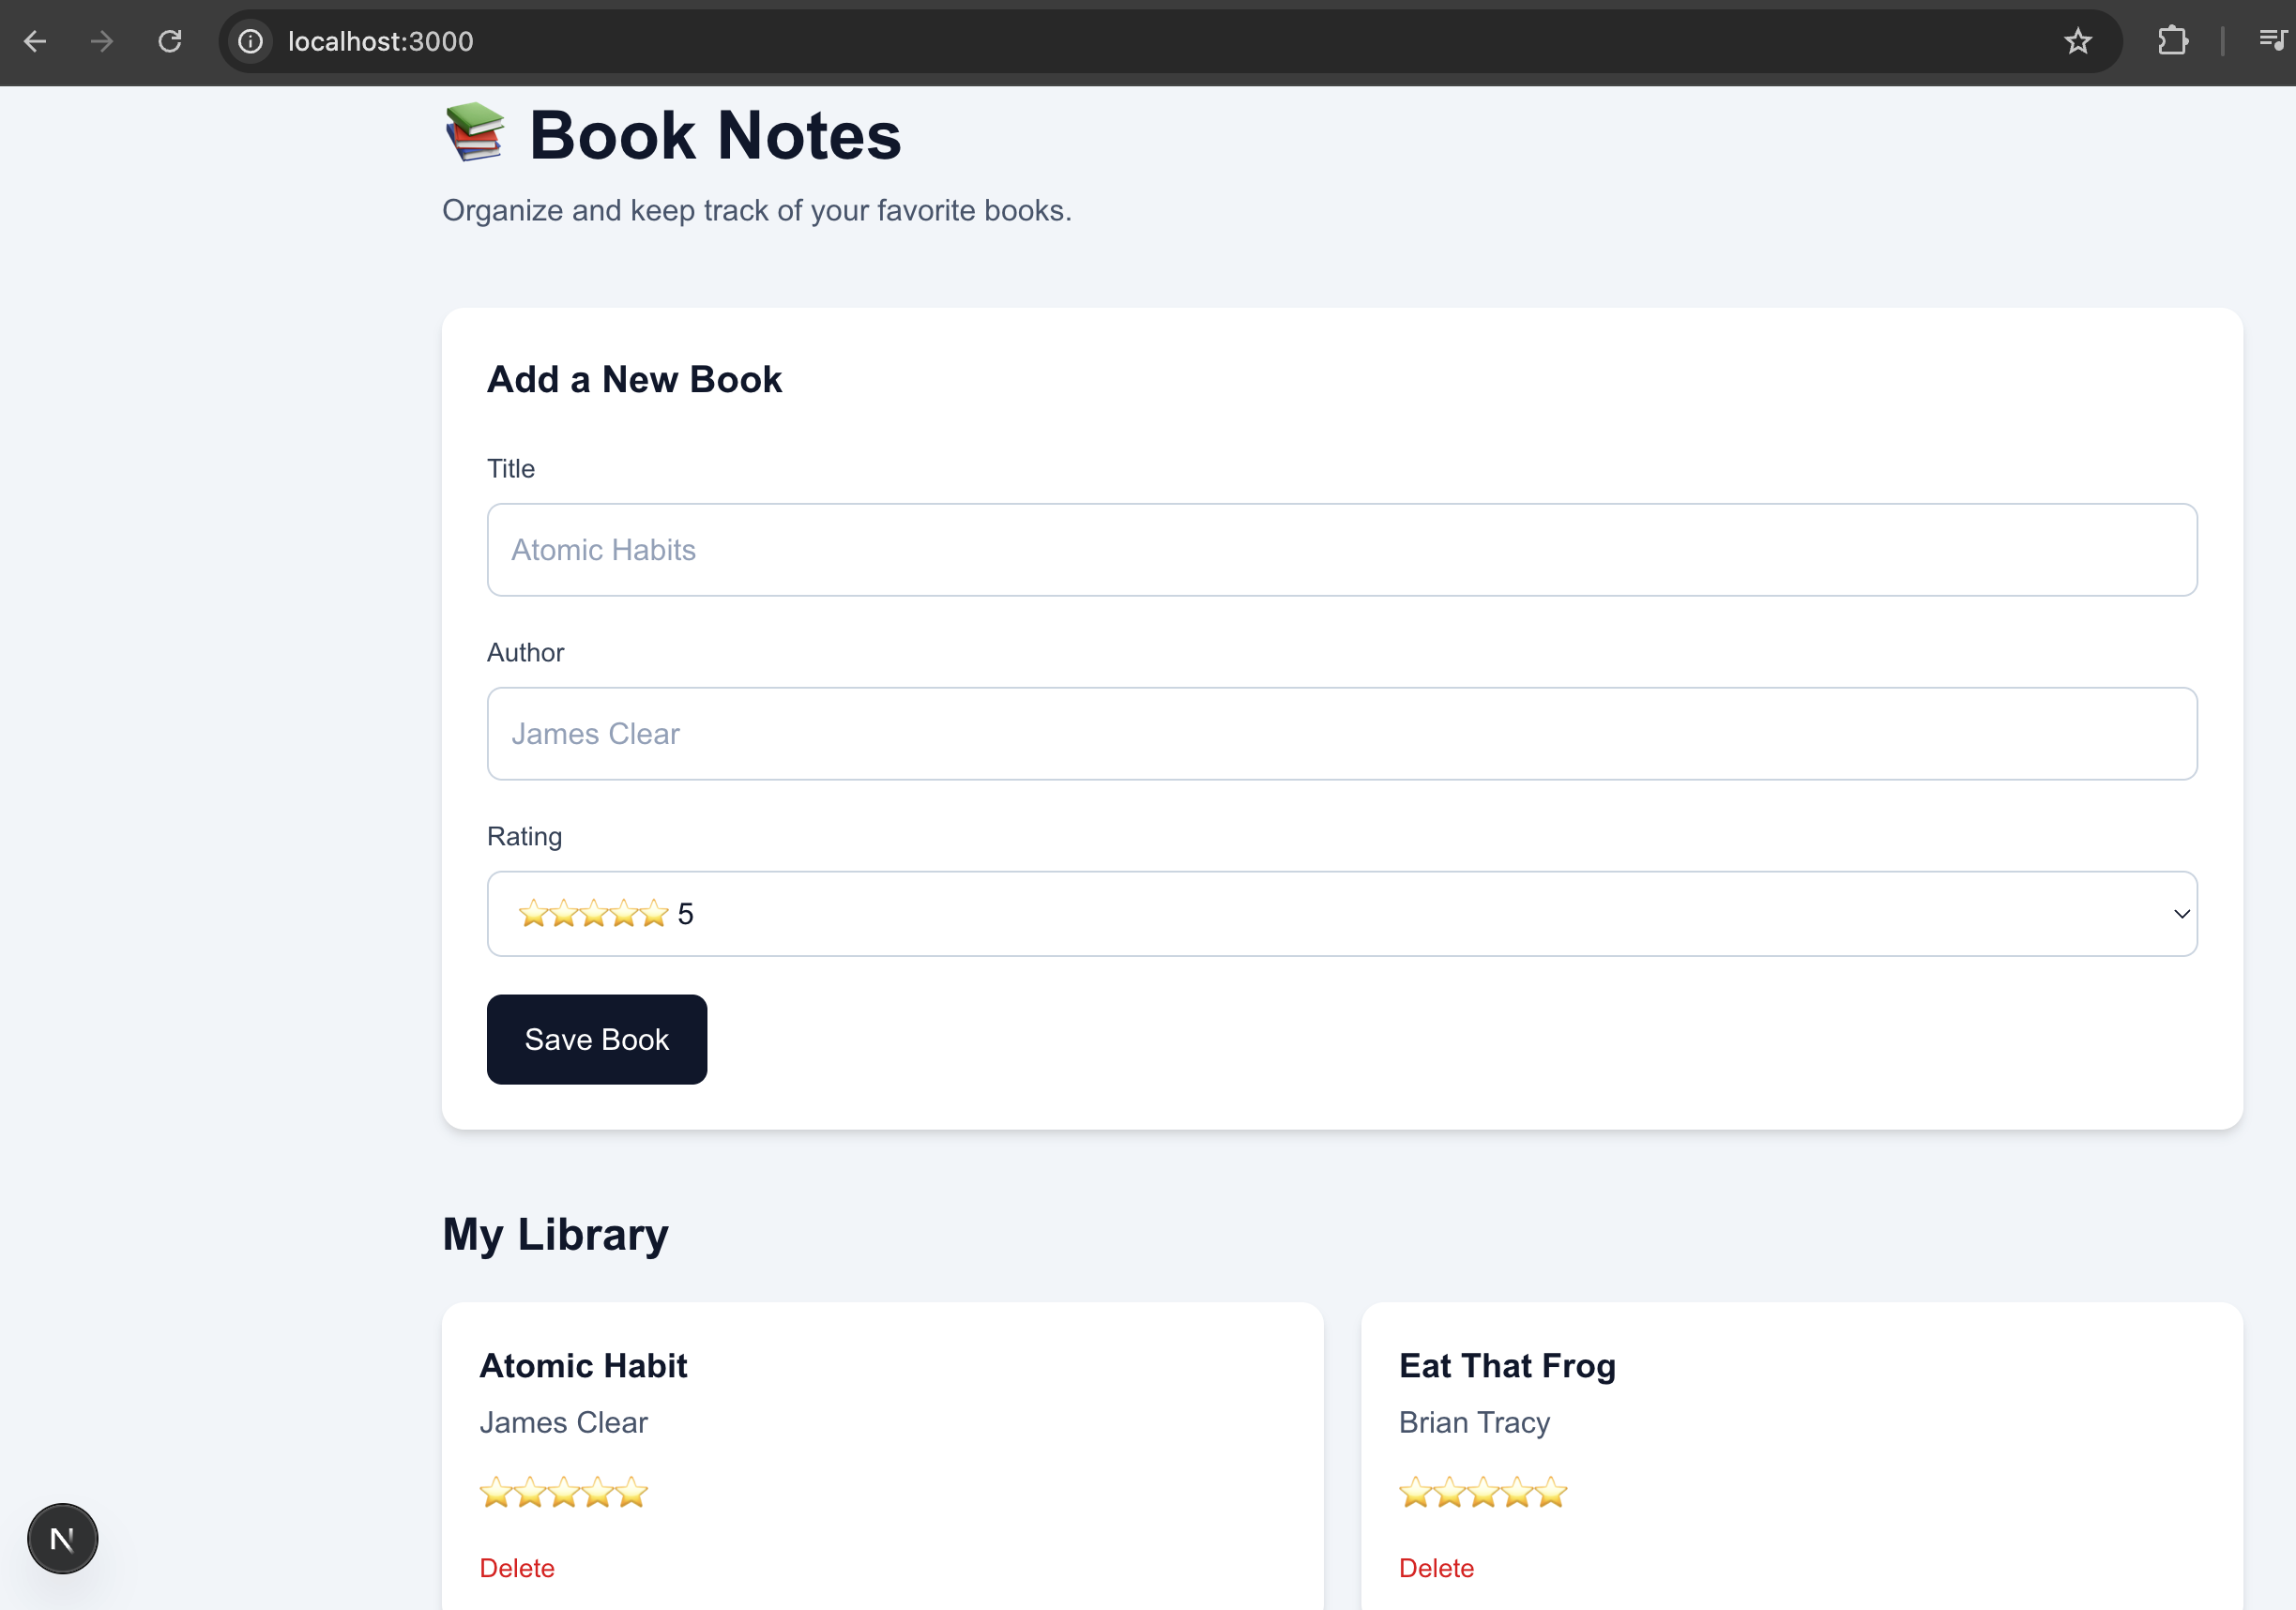
To grasp the full concept of Docker Compose, we’ll be using a simple full-stack app called Book Notes. This app tracks the books you’ve read by storing the title, author and star rating of each book input by the user.
git clone https://github.com/Ikein-Sarah/book-notes.git
cd book-notes
cp .env.example .env
This project is made up of three services:
- Frontend: A Next.js app that renders the book list and the form for adding new books. It runs on port 3000.
- Backend: A FastAPI service that handles the requests coming from the frontend and reads and writes to the database. It runs on port 8000.
- Database: A PostgreSQL database that stores the books. It runs on port 5432.
Each one runs in its own container. The frontend talks to the backend, and the backend talks to the database, so all three need to be running at the same time for the app to work. Docker Compose lets you run all three with one command.
Step 2: Installing Docker Compose
Docker Compose ships with Docker, so there’s no separate install. Follow the guide for your operating system:
Once it’s done, start Docker and confirm the install:
docker --versionOutput:
Docker version 28.1.1, build 4eba377docker compose versionOutput:
Docker Compose version v2.35.1Step 3: Writing the Docker Compose file
Docker Compose reads a YAML file called docker-compose.yml, usually located at
the root of your project. Inside it, you define the services your application
needs, and Compose uses those definitions to create and manage the containers.
Here’s the complete docker-compose.yml file for our application:
services:
  db:
    image: postgres:17
    environment:
      POSTGRES_USER: ${POSTGRES_USER}
      POSTGRES_PASSWORD: ${POSTGRES_PASSWORD}
      POSTGRES_DB: ${POSTGRES_DB}
    ports:
      - "5432:5432"
    volumes:
      - postgres_data:/var/lib/postgresql/data
    healthcheck:
      test: ["CMD-SHELL", "pg_isready -U ${POSTGRES_USER} -d ${POSTGRES_DB}"]
      interval: 5s
      timeout: 5s
      retries: 5

  backend:
    build: ./backend
    environment:
      DATABASE_URL: ${DATABASE_URL}
    ports:
      - "8000:8000"
    depends_on:
      db:
        condition: service_healthy

  frontend:
    build: ./frontend
    environment:
      # Requests are made from the browser, so this must be a URL reachable
      # from the host machine, not the "backend" Docker service name.
      NEXT_PUBLIC_API_URL: http://localhost:8000
    ports:
      - "3000:3000"
    depends_on:
      - backend

volumes:
  postgres_data:
Note that services is where each container is defined. In this file there are
three: db, backend, and frontend. Compose puts them all on the same
network and lets them find each other by these names.
Now that you’ve seen the complete file, let’s break it down and look at what each section does.
Database
Let’s start with the database, since the backend can’t run without it.
  db:
    image: postgres:17
    environment:
      POSTGRES_USER: ${POSTGRES_USER}
      POSTGRES_PASSWORD: ${POSTGRES_PASSWORD}
      POSTGRES_DB: ${POSTGRES_DB}
    ports:
      - "5432:5432"
    volumes:
      - postgres_data:/var/lib/postgresql/data
    healthcheck:
      test: ["CMD-SHELL", "pg_isready -U ${POSTGRES_USER} -d ${POSTGRES_DB}"]
      interval: 5s
      timeout: 5s
      retries: 5
This configuration includes:
dbis the name we’re giving this service.imagepulls the official PostgreSQL image from Docker Hub.environmentsets the database name, user, and password. The${POSTGRES_USER}syntax reads the value from your.envfile instead of hardcoding it.portsmaps port 5432 in the container to port 5432 on your machine, so you can connect with a database client if you want to.volumessaves the database files to a named volume calledpostgres_data. Without it, every book you add would disappear as soon as you stopped the containers.healthchecktells Compose whether the database is ready to accept connections. It runspg_isreadyevery 5 seconds until PostgreSQL responds.
Backend
Next, we have the FastAPI service that handles requests from the frontend and reads and writes to the database:
  backend:
    build: ./backend
    environment:
      DATABASE_URL: ${DATABASE_URL}
    ports:
      - "8000:8000"
    depends_on:
      db:
        condition: service_healthy
This configuration includes:
buildpoints to the backend directory, where the Dockerfile lives. Docker Compose will build an image from the instructions in the file.environmentpasses inDATABASE_URL, the connection string the backend uses to reach the database. It’s read from your.envfile.portsmaps port 8000 in the container to port 8000 on your machine, so you can open the API in your browser.depends_onuses the database healthcheck to make sure the database is ready before starting the backend, so the backend doesn’t try to connect before the database is ready.
Frontend
Last is the Next.js app that renders the book list and the form for adding new books:
  frontend:
    build: ./frontend
    environment:
      # Requests are made from the browser, so this must be a URL reachable
      # from the host machine, not the "backend" Docker service name.
      NEXT_PUBLIC_API_URL: http://localhost:8000
    ports:
      - "3000:3000"
    depends_on:
      - backend
This configuration includes:
buildpoints to the frontend directory, where its Dockerfile lives.environmentpasses inNEXT_PUBLIC_API_URL, the address the app uses to reach the backend.portsmaps port 3000 in the container to port 3000 on your machine, which is where you’ll open the app.depends_onstarts the backend before the frontend. There’s no healthcheck on the backend, so this only waits for the container to start.NEXT_PUBLIC_API_URLpoints tolocalhostbecause it’s used by JavaScript running in your browser, which reaches the backend through the published port.
Volumes
volumes:
  postgres_data:
The postgres_data volume that db referenced earlier gets declared here. It
sits at the same level as services, not inside it, which is why your data
survives even when the containers are removed.
Step 4: Building and running the app
With the compose file written, you can start everything with one command. Run this from the project root:
docker compose up --buildCompose builds the frontend and backend images, pulls the PostgreSQL image, then starts all three containers. The first run takes a few minutes since the images are being built from scratch. Later runs are faster because Docker caches the layers.
Once the build finishes, you’ll see all three services come up with these logs:
[+] Running 5/5
 ✔ book-notes-backend               Built
 ✔ book-notes-frontend              Built
 ✔ Container book-notes-db-1        Running
 ✔ Container book-notes-backend-1   Created
 ✔ Container book-notes-frontend-1  Created
Attaching to backend-1, db-1, frontend-1
frontend-1  | ▲ Next.js 16.3.0 (Turbopack)
frontend-1  | - Local:   http://localhost:3000
frontend-1  | ✓ Ready in 511ms
backend-1   | INFO:     Application startup complete.
backend-1   | INFO:     Uvicorn running on http://0.0.0.0:8000
Open http://localhost:3000 in your browser. Add a few books and they’ll appear in the list:
The --build flag tells Compose to build the images before starting. You only
need it the first time, or after changing a Dockerfile or your dependencies.
After that, docker compose up is enough.
To stop everything, press Ctrl+C.
Essential Docker Compose commands
Here are the commands you’ll use most once your app is running.
docker compose up -d
Starts the app and returns your terminal prompt, so you can keep working in the same window:
docker compose up -d➜ book-notes git:(master) docker compose up -d
[+] Running 3/3
✔ Container book-notes-db-1 Healthy
✔ Container book-notes-backend-1 Running
✔ Container book-notes-frontend-1 Running
➜ book-notes git:(master)Notice the prompt comes back at the end. The app is still running at http://localhost:3000, but the logs no longer stream to your screen.
docker compose ps
Shows which services are running:
docker compose ps➜ book-notes git:(master) docker compose ps
NAME STATUS PORTS
book-notes-backend-1 Up 49 minutes 0.0.0.0:8000->8000/tcp
book-notes-db-1 Up 47 hours (healthy) 0.0.0.0:5432->5432/tcp
book-notes-frontend-1 Up 49 minutes 0.0.0.0:3000->3000/tcpYou get each service, how long it’s been up, and which ports it’s using. If something stopped working, check here first. A service that crashed shows as exited instead of up.
docker compose logs
Brings back the logs you stopped seeing when you started the app in the background:
docker compose logs -f backend➜ book-notes git:(master) docker compose logs -f backend
backend-1 | INFO: Application startup complete.
backend-1 | INFO: Uvicorn running on http://0.0.0.0:8000
backend-1 | INFO: 172.19.0.1:52134 - "GET /books HTTP/1.1" 200 OKThe -f flag keeps the logs streaming as new ones come in.
docker compose down
Stops the app and removes the containers:
docker compose down➜ book-notes git:(master) docker compose down
[+] Running 4/4
✔ Container book-notes-frontend-1 Removed
✔ Container book-notes-backend-1 Removed
✔ Container book-notes-db-1 Removed
✔ Network book-notes_default Removed
➜ book-notes git:(master)It also removes the network Compose created. Your books are still saved though,
because the data lives in the postgres_data volume and down leaves volumes
alone. Run docker compose up again and they’ll be right where you left them.
docker compose down -v
Same as down, but it deletes the volume too:
docker compose down -v➜ book-notes git:(master) docker compose down -v
[+] Running 1/1
✔ Volume book-notes_postgres_data RemovedUse this when you want to start completely fresh. It wipes your database and every book in it, and there’s no way to get them back.
Final thoughts
In this tutorial, you set up a full-stack application with Docker Compose, wrote a compose file defining three interdependent services, and learned the commands for running and managing them.
For further exploration, see the Docker Compose documentation.